How It Works
Easy Guide

Step 1
Purchase an eSIM to receive an email containing the QR code

Step 2
Scan the QR image with your camera app

Step 3
Follow the steps shown on the screen

Step 4
Enjoy surfing the internet with enjoyesim
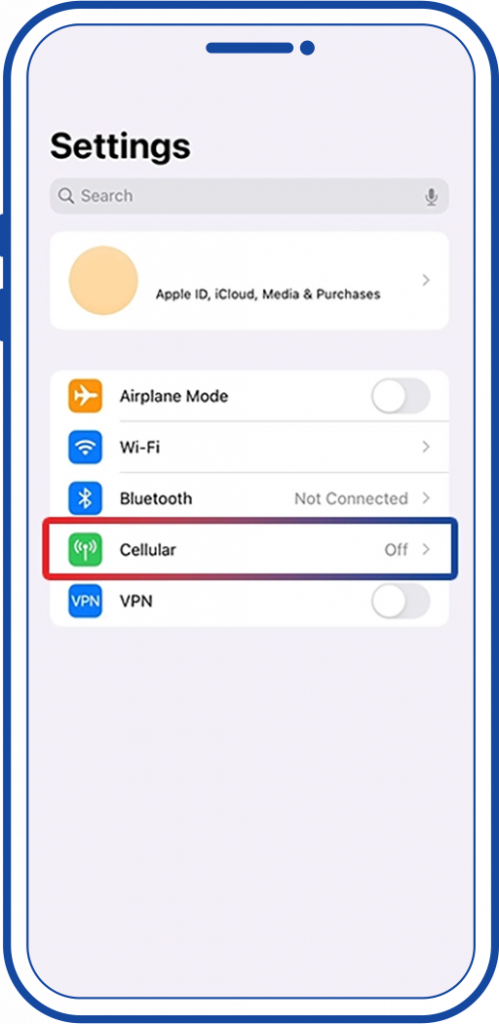
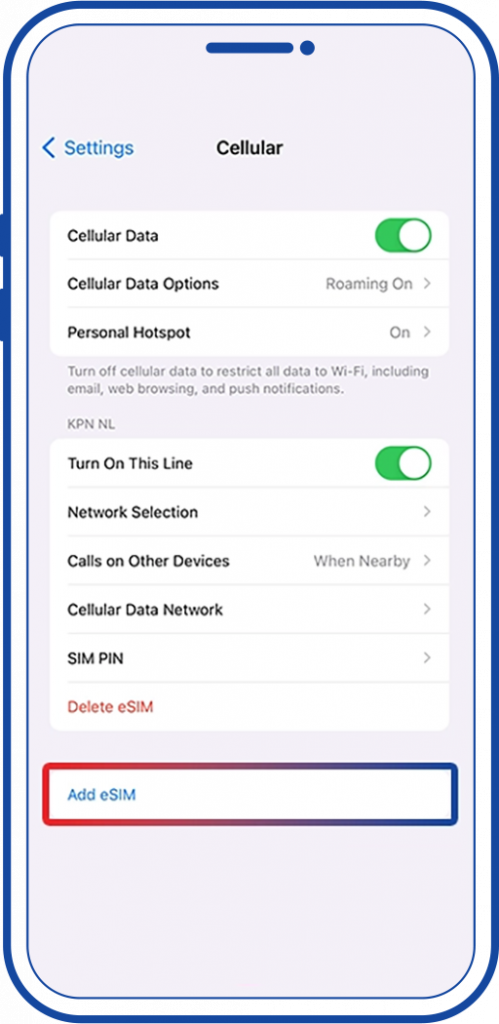
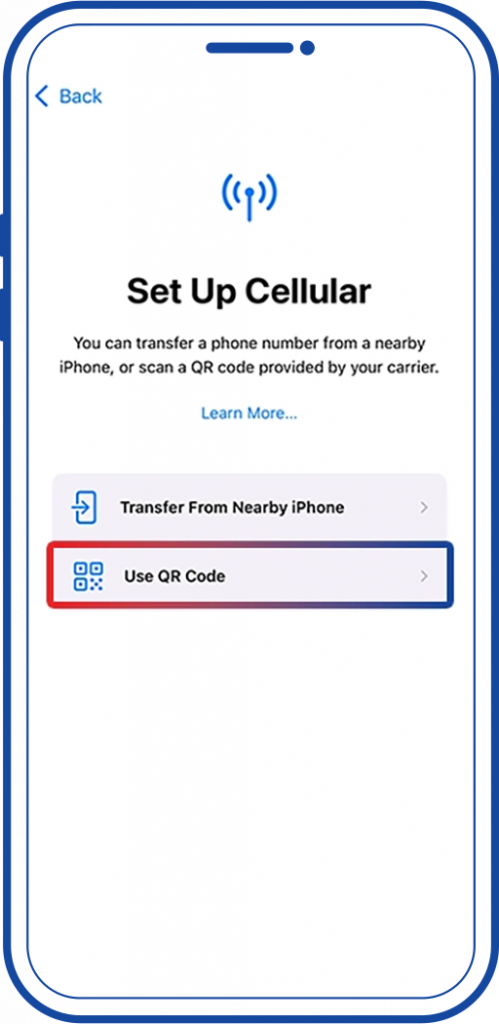
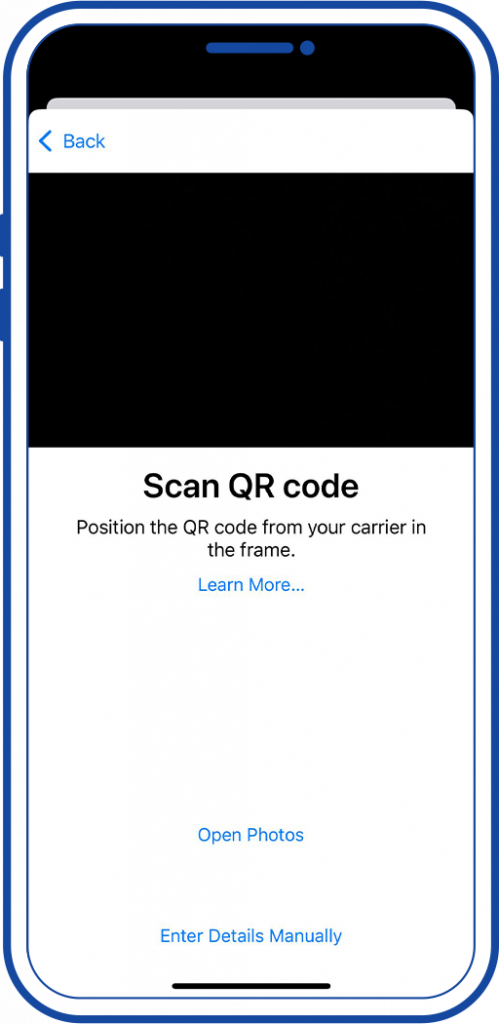
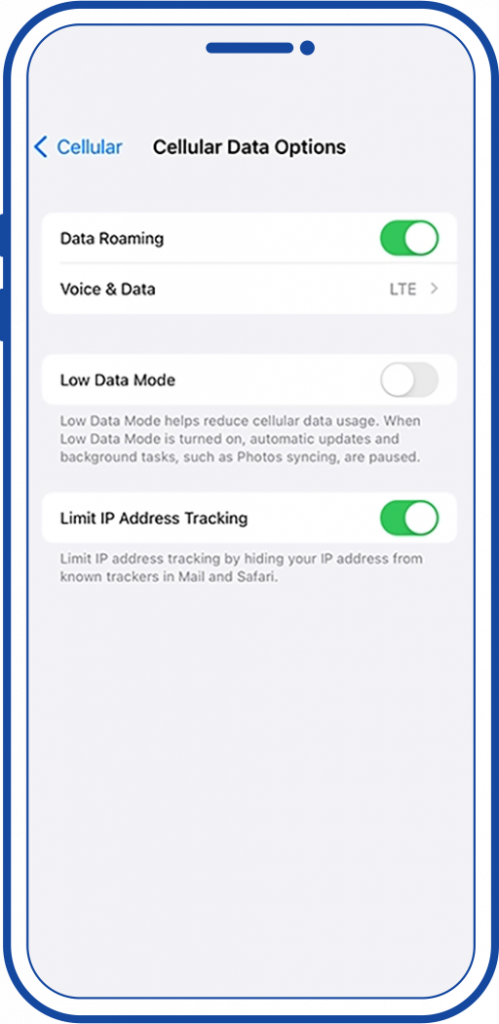
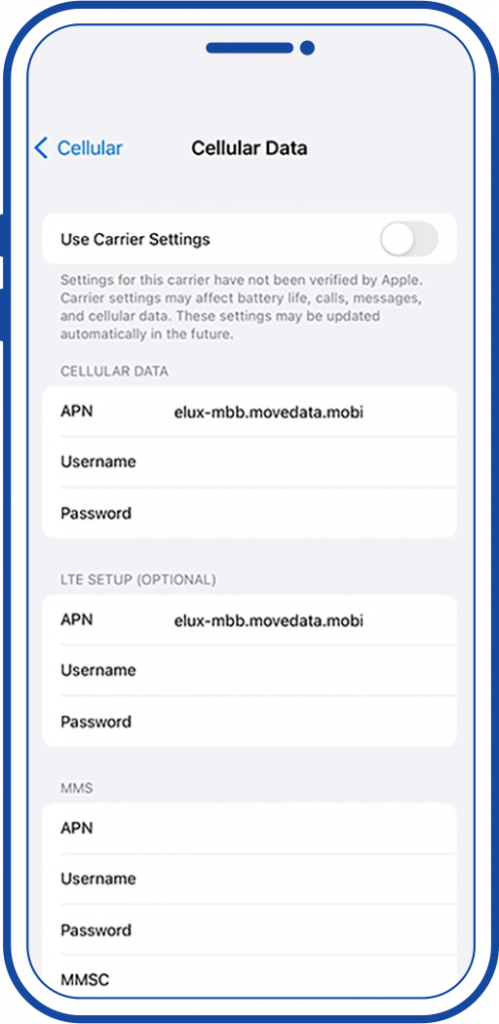
After finalizing the purchase, check your email inbox
Open your Camera app  and scan the QR code attached in the email.
Your smart phone should detect the eSIM and proceed with the installation process.
After the installation process is completed, click on Add to finalize the process.
Give your eSIM a label to identify it in case you have another SIM/eSIM to distinguish among them.
You can either choose a label from a pre-defined list or write the label manually, try writing “enjoyesim”
After finalizing the purchase, check your email inbox
Open your Camera app  and scan the QR code attached in the email.
Your smart phone should detect the eSIM and proceed with the installation process.
Give your eSIM a label to identify it in case you have another SIM/eSIM to distinguish among them.
You can either choose a label from a pre-defined list or write the label manually, try writing “enjoyesim”
If you have your physical SIM inserted, you’ll be presented with the default line option for making calls/receiving SMS.
Since enjoyesim is used for data only, select your primary SIM as your default line.
If you have previously activated/used iMessage, you’ll be presented with this option to choose which SIM you’d like to use for iMessage.
Select your primary SIM to keep using your iMessage with your previously configured number/email.
If you haven’t travelled yet, select your primary SIM as your default mobile data.
If you have already travelled/in your destination country, selecting enjoyesim will start the data usage.

Don't worry if you're still facing a problem!
You can reach us anytime and we'll support you all the way.